Table of Contents
- What Files Should Buyers Submit?
- Start With the Supplier's Final Dieline
- Plan Artwork Around Functional Zones
- Artwork File Format Comparison
- Set Up Colors for Flexible Packaging Printing
- Check Images, Fonts, and Fine Graphic Elements
- Deliverables by Spout Pouch Format
- Prepare Barcodes and Variable Information
- Approve the Prepress Proof Before Production
- Buyer Artwork Submission Checklist
A buyer-focused prepress guide to preparing custom spout pouch artwork, including editable file requirements, dieline controls, print colors, image resolution, barcodes, finishes, and proof approval.
What Files Should Buyers Submit?

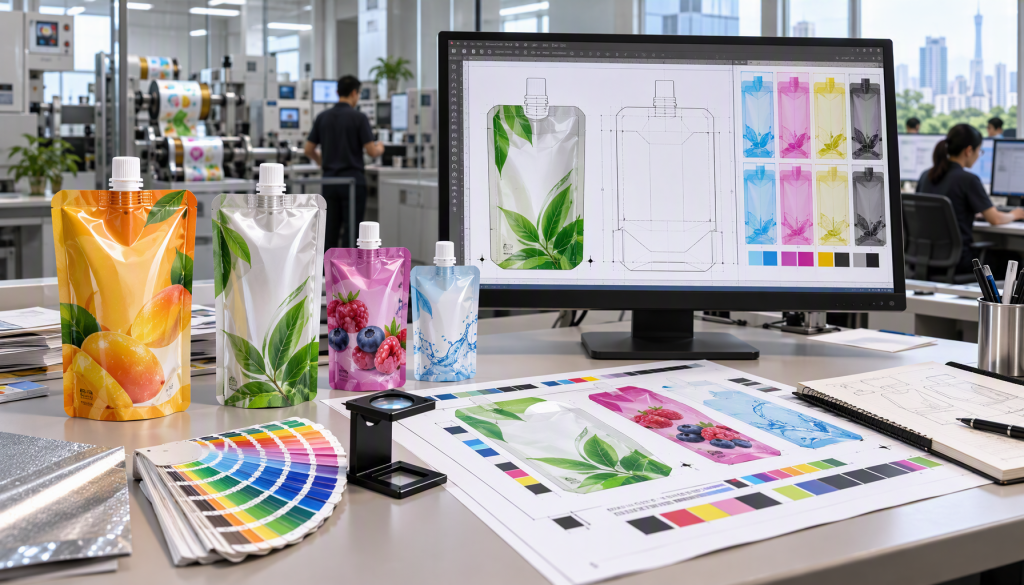
Custom spout pouch artwork should normally be supplied as an editable vector file built on the pouch manufacturer’s approved dieline. The submission package should include linked or embedded high-resolution images, outlined fonts or licensed font files, defined process and spot colors, finish instructions, barcode files, and a reference PDF. Exact bleed, minimum line width, color count, trapping, and resolution requirements depend on the printer, printing process, laminate, pouch dimensions, and press configuration, so buyers should obtain written prepress specifications before finalizing the design.
The artwork is only one part of the package specification. Spout position, cap dimensions, seals, gussets, tear features, and filling orientation affect where important graphics can be placed. Buyers should therefore confirm the pouch structure and fitment before releasing production artwork. HUACANG Packaging has manufactured flexible packaging in Guangzhou, China since 1998, including custom spout pouches, laminated bags, roll film, and bag-in-box packaging for international B2B buyers.
A complete artwork handoff usually contains:
- The manufacturer’s current dieline at 1:1 scale
- An editable Adobe Illustrator or compatible vector source file
- A PDF reference showing the intended final appearance
- Placed images at the requested effective resolution
- Defined CMYK builds and named spot colors
- Separate layers for artwork, dimensions, white ink, varnish, and special finishes where applicable
- Barcode and regulatory copy in final approved form
- A version number, revision date, SKU name, and responsible approver
Start With the Supplier's Final Dieline
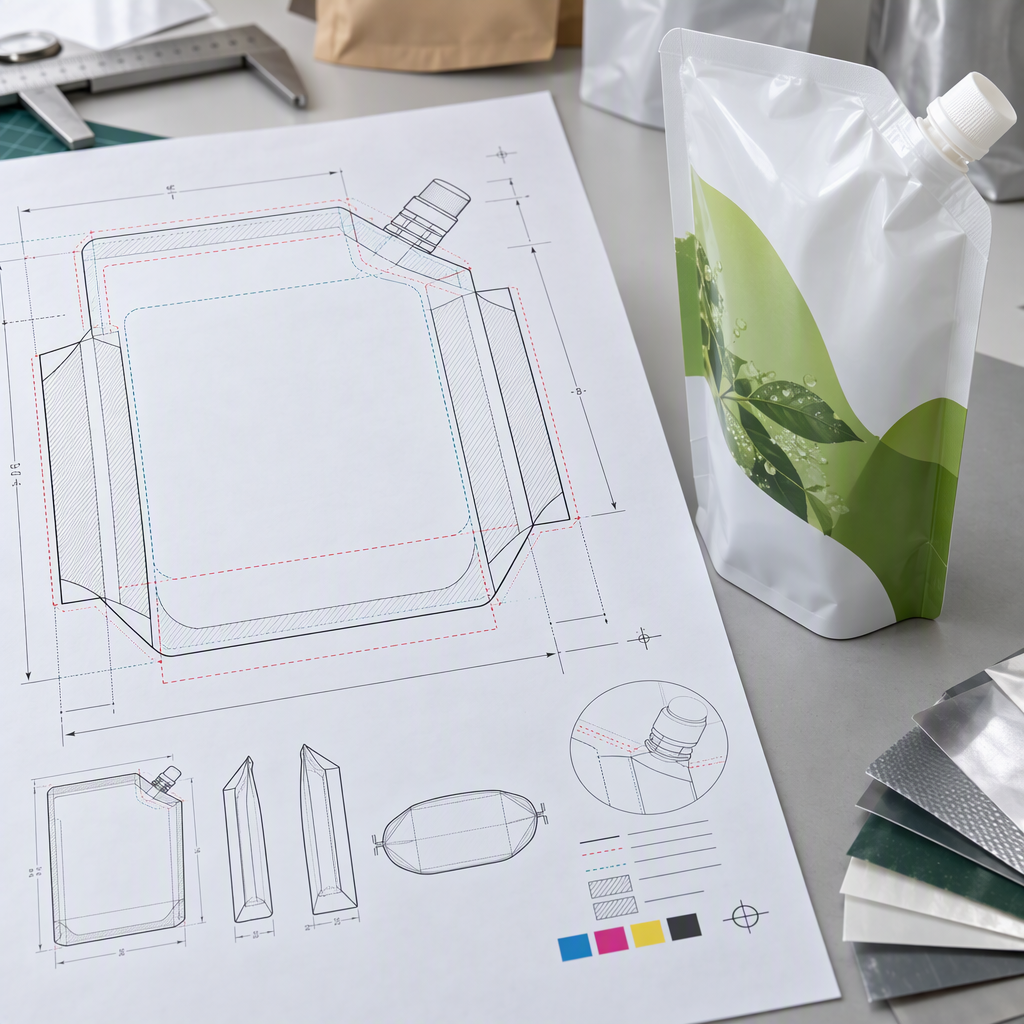
A spout pouch dieline is the technical drawing that maps the flat printed web to the finished pouch. It may identify the trim or pouch outline, front and back panels, bottom or side gussets, seal bands, spout location, punch holes, tear notches, registration marks, and printing direction. It should remain on a locked, nonprinting layer unless the supplier instructs otherwise.
Do not create production artwork from an estimated rectangle or a dieline from another supplier. Two pouches with the same nominal fill volume can have different dimensions, gusset geometry, fitment locations, seal widths, and machine tolerances. A fitment change can also alter the surrounding no-print or low-priority area. Review available spout pouch closure and seal design considerations before freezing graphics around the pouch corner or top panel.
Keep the file at 1:1 scale unless the printer has approved another scale. Do not resize, rotate, redraw, or unlock technical lines. If the design agency must use a scaled file because of software limits, the scale should be prominently documented in both the source file and the approval PDF.
Plan Artwork Around Functional Zones
The printable canvas is not the same as the safe area for critical content. Logos, legal text, net quantity statements, barcodes, and opening instructions should remain inside the supplier-defined safe zone. Background colors and images generally extend through the bleed area, while essential details should stay clear of trim variation, seals, gusset folds, fitment welds, and tear features.
- Bleed: Extend background artwork beyond the trim boundary by the printer’s specified amount. A range such as 2 to 3 mm is common in packaging workflows, but it is not a universal requirement.
- Seal areas: Avoid critical text and color-sensitive details where heat seals, wrinkles, or changes in opacity may affect appearance.
- Gussets: Confirm which portions are visible when the pouch is empty, filled, standing, or displayed on a shelf.
- Spout area: Keep instructions and brand elements clear of the fitment weld, cap, and possible distortion around insertion.
- Eye marks and registration marks: Leave these production controls intact and outside consumer-facing artwork as directed by the converter.
Use a physical mock-up to assess viewing angles. A flat screen proof cannot fully show how a logo wraps around a gusset or how the filled pouch changes panel curvature.
Artwork File Format Comparison
The production source should preserve editable vectors, color separations, layers, and linked assets. A flattened preview is useful for reference but usually cannot replace the source file.
| File format | Recommended use | Main limitation |
|---|---|---|
| AI | Preferred editable source for vector graphics, layers, spot colors, and dielines when supported by the printer | Fonts and links must be packaged, embedded, or otherwise resolved |
| Press-ready PDF | Reference, proofing, or production when exported to the printer’s requested PDF standard | Transparency, overprint, layers, or spot colors can be altered by incorrect export settings |
| EPS | Vector logos, barcode components, or legacy artwork workflows | Limited support for modern transparency and layered editing |
| PSD or TIFF | High-resolution photographic or raster elements placed into the main layout | Not ideal as the only file for text, dielines, or scalable vector graphics |
| JPEG or PNG | Visual reference and limited image assets | Usually unsuitable as the complete production file because text and logos may be rasterized and colors may be difficult to separate |
Ask the printer which software version and PDF export preset it accepts. Package linked assets even when they appear embedded in the approval PDF, and remove unused hidden objects that could create separation errors.
Set Up Colors for Flexible Packaging Printing
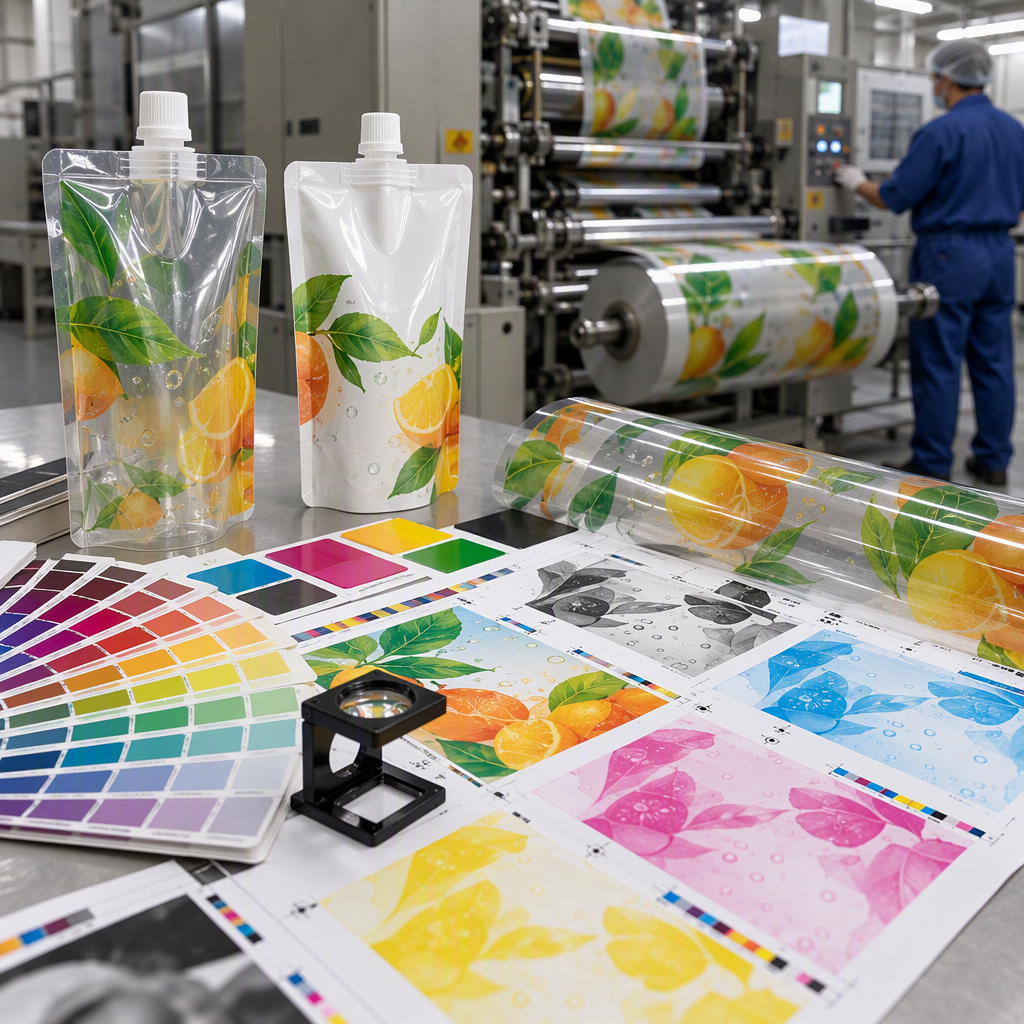
Flexible packaging artwork should identify every printed color and coating clearly. CMYK process colors reproduce images and many mixed colors, while named spot colors may be used for brand colors, opaque white, metallic effects, or functional varnishes. A rotogravure packaging artwork file generally requires a separate separation for each intended printing color or coating; the actual number of cylinders and available press stations must be confirmed with the converter.
Do not rely on an office printer or uncalibrated monitor as a color standard. Pantone or another physical color reference can communicate a target, but the printed result is affected by ink system, film transparency, reverse or surface printing, white-ink backing, lamination, adhesive, and surface finish. The printer should review whether a target is practical on the chosen structure.
For transparent films, specify where opaque white should print and where clear windows should remain. Name the white-ink layer unmistakably and set it as a spot separation according to the supplier’s instructions. Confirm whether matte or gloss effects are produced by the substrate, an overprint varnish, registered matte coating, or another construction. Designs for mono-material or PCR spout pouch options may require a new print trial or color review because the selected film can differ visually from an earlier laminate.
Check Images, Fonts, and Fine Graphic Elements
Evaluate raster images at their final placed size, not only at their original dimensions. Many printers request approximately 300 pixels per inch for continuous-tone images at final size, but the correct threshold should come from the printer. Enlarging a low-resolution image inside the layout reduces its effective resolution and does not add real detail.
Convert text to outlines in the final production file or supply the required font files when licensing permits. Keep an editable text version in a separate working file so copy can be corrected without rebuilding letters. Outlining prevents font substitution, but it does not confirm spelling, legal accuracy, or minimum readable size.
Very thin rules, small reversed text, fine screens, gradients, and closely aligned multicolor elements can be sensitive to plate or cylinder production and press registration. Ask prepress to confirm minimum positive and reverse line widths, minimum type sizes, trapping, rich-black construction, total ink coverage, gradient limits, and overprint settings. These values vary by printing process and design, so they should not be assumed from general graphic-design standards.
Deliverables by Spout Pouch Format
The required artwork package changes with pouch construction and order configuration. The following table helps buyers identify files and decisions that may be needed; it does not replace a project-specific dieline.
| Pouch or order format | Artwork deliverables to confirm | Production detail to verify |
|---|---|---|
| Standard corner-spout pouch | Front, back, and gusset artwork on the approved dieline; white and finish layers where applicable | Spout corner, cap clearance, seals, and filling orientation |
| Center-spout pouch | Panel graphics aligned around the top-center fitment and weld area | Symmetry, top profile, hanging or display orientation, and cap overlap |
| Shaped spout pouch | Artwork following the final custom contour with backgrounds extended into approved bleed | Trim path, contour tolerances, critical-copy safe area, and tooling status |
| Transparent-window pouch | Dedicated opaque-white separation defining printed and clear areas | Window position, laminate appearance, and potential show-through |
| Multiple SKUs | One controlled file per SKU plus a matrix of common and changing elements | Language, flavor, color, barcode, net content, and version accuracy |
| Rollstock for form-fill-seal | Repeat layout, eye mark, web direction, lane details, and unwind orientation | Machine pitch, repeat length, slit width, and registration controls |
When artwork changes between SKUs, clearly distinguish shared graphics from variable elements. Do not assume the converter will infer which barcode, flavor color, or legal panel belongs to each purchase-order line.
Prepare Barcodes and Variable Information
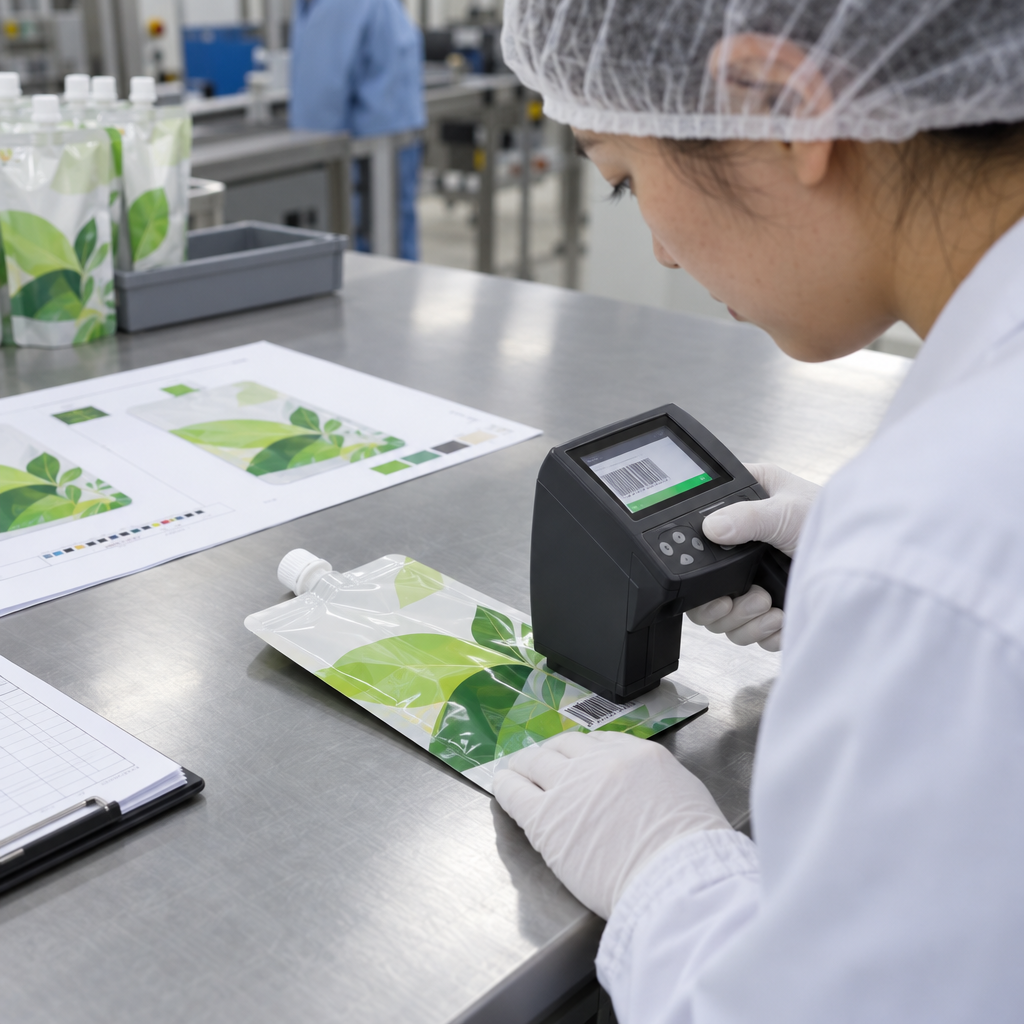
Supply barcodes as vector artwork whenever possible and identify the intended barcode type and encoded data. Avoid manually redrawing bars or stretching the symbol disproportionately. Magnification, bar-width adjustment, quiet zones, color contrast, print direction, laminate appearance, and final pouch curvature can all affect scanning.
The brand owner is responsible for assigning the correct data and confirming market-specific labeling requirements. The printer can check file construction and may be able to perform barcode verification, but visual approval alone does not establish that the encoded number or regulatory copy is correct. Buyers should request the available verification method and agree on acceptance criteria before production.
Variable elements commonly include SKU names, flavors, languages, net contents, lot-code areas, recycling instructions, distributor details, and barcodes. Use a signed SKU matrix to control these changes. Keep coding areas clear of heavy graphics if the filler will later apply inkjet, thermal-transfer, laser, or other variable information, and test the intended coding method on the actual surface.
Approve the Prepress Proof Before Production
After preflight, the converter should issue a proof or artwork approval file showing the production layout. Review dimensions, orientation, color names, white-ink coverage, finish areas, copy, barcodes, spout position, seals, gusset content, and print direction. Compare the proof against the approved source rather than relying on memory or an earlier email attachment.
A digital PDF proof is suitable for content, placement, and separation review, but it may not predict exact color, opacity, gloss, or the appearance of a laminated pouch. Depending on project risk and supplier capabilities, buyers can discuss a calibrated color proof, printed film sample, unprinted structural sample, or production trial. The appropriate route depends on artwork complexity, color sensitivity, structure, order size, tooling, schedule, and budget.
For a new pouch, approve physical dimensions and filling compatibility as well as print appearance. The guidance on approving spout pouch samples before production can help buyers separate structural checks from artwork checks. Retain the signed proof, approved dieline, source file, color references, sample, and revision history as the master record for reorders.
Buyer Artwork Submission Checklist
Before sending the pouch printing file setup to prepress, confirm the following points:
- The file uses the supplier’s latest dieline at the documented scale.
- The pouch size, capacity, structure, spout, cap, and filling orientation are identified.
- Critical copy remains inside the safe area, and backgrounds include the required bleed.
- Seal bands, gusset folds, trim paths, fitment welds, and production marks are respected.
- All colors, opaque-white areas, clear windows, and finishes are named and separated.
- Images meet the supplier’s effective-resolution requirement at final size.
- Fonts are outlined or properly supplied, and an editable copy is retained.
- Barcodes are correctly encoded, sized, positioned, and scheduled for verification.
- Every SKU has a unique file name, revision number, and matching purchase-order reference.
- The package includes the editable source, linked assets, reference PDF, and color targets.
- An authorized person has reviewed copy, regulatory content, and commercial claims.
- The approval process and consequences of post-approval changes are understood.
Prepress approval confirms the file that will be used for printing; it does not replace product compatibility, filling, seal, distribution, or regulatory validation. When selecting a production partner, include prepress controls and revision management in the broader process used to evaluate a spout pouch supplier.
FAQ
What is the preferred file format for custom spout pouch artwork?
An editable vector file, commonly Adobe Illustrator format, is often preferred because it preserves paths, text outlines, spot colors, layers, and dieline alignment. Include all linked assets and a reference PDF. The printer should confirm accepted software versions and PDF standards before the agency exports final files.
How much bleed should pouch artwork include?
Use the bleed specified on the converter’s approved dieline. A value around 2 to 3 mm may be used in some flexible packaging workflows, but it is not universal. Pouch format, trimming process, press setup, and converter tolerances determine the actual requirement.
Should spout pouch artwork use CMYK or Pantone colors?
It may use CMYK process colors, named spot colors, or a combination. Spot colors are often considered for important brand colors, opaque white, or special coatings. The available color count and achievable appearance depend on the press, ink, film, white backing, laminate, and finish. Confirm every separation with prepress.
What image resolution is required for flexible packaging artwork?
Many printers request approximately 300 pixels per inch for continuous-tone images at final printed size, but buyers should follow the printer’s written specification. Effective resolution matters: enlarging an image in the layout lowers its effective resolution.
Can a PDF or JPEG be used as the only production file?
A properly prepared press-ready PDF may be accepted in some workflows. A JPEG is generally better used as a visual reference because it does not preserve editable vectors, spot-color separations, or production layers. Submit the editable source and packaged assets unless the printer explicitly approves another workflow.
Why does the artwork need a separate white-ink layer?
On transparent or metallic film, white ink can provide opacity behind colors and text while selected areas remain clear or show the substrate. A dedicated spot-color separation tells prepress exactly where white ink is intended. Naming and overprint settings should follow the supplier’s instructions.
Does approval of a digital proof guarantee the final printed color?
No. A standard digital proof primarily confirms content, layout, and separations. Final color and appearance are influenced by inks, film, white backing, reverse printing, adhesive, lamination, and finish. Color-sensitive projects may require an agreed physical color reference, calibrated proof, printed film sample, or production trial.
When should artwork preparation begin?
Begin design after the pouch dimensions, structure, spout, cap, seal layout, filling orientation, and supplier dieline are sufficiently defined. Early creative concepts can be developed before then, but final production artwork should not be released against estimated geometry.
Discuss Your Spout Pouch Artwork and Production Requirements
Contact HUACANG Packaging to review your pouch structure, spout fitment, artwork files, MOQ, sample needs, and quotation requirements. Provide the intended product, fill volume, filling process, pouch dimensions, destination market, and available design files for a project-specific review.